
Build the proposal around a clear anatomical view
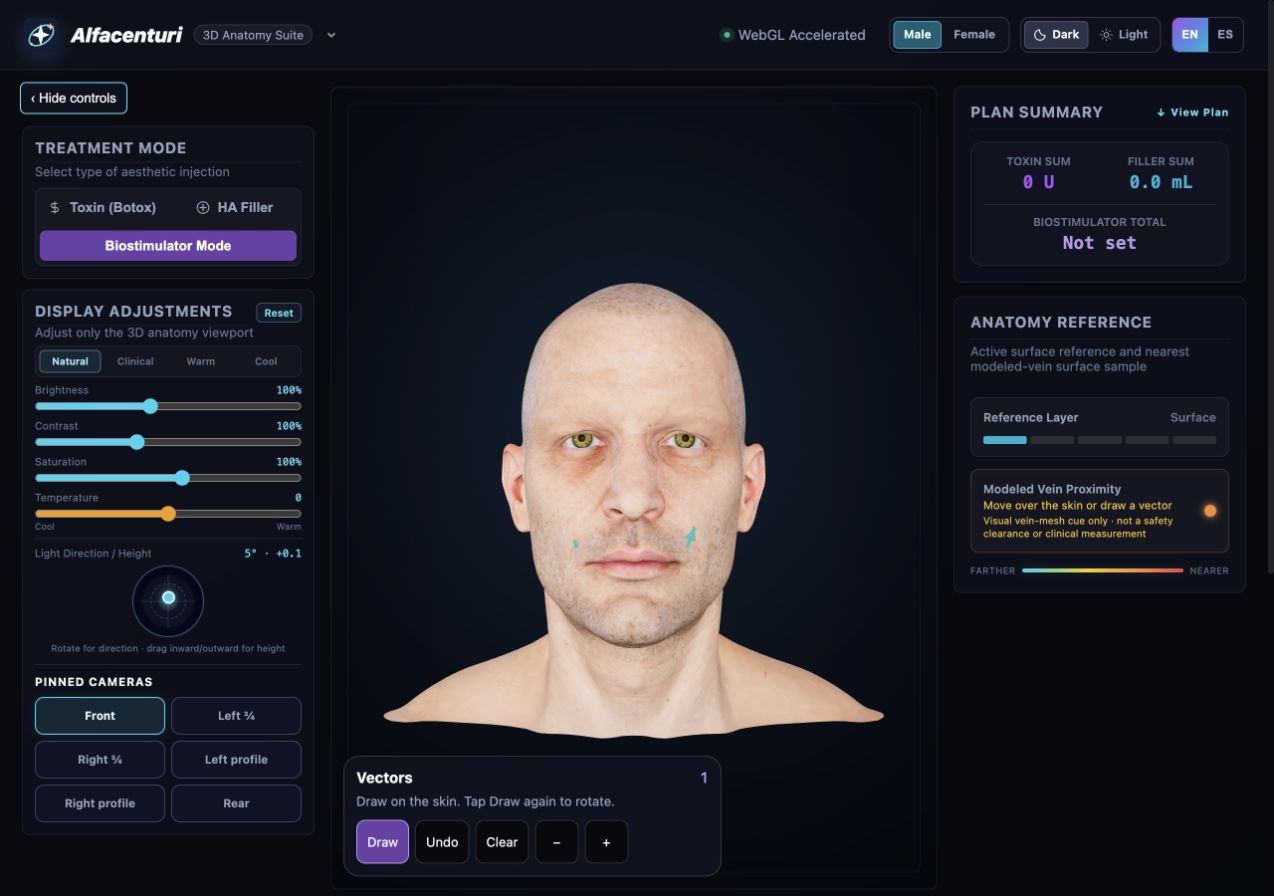
The male model in biostimulator mode with a demonstration vector. No treatment quantity has been assigned.
View full-size screenshotStart with the model and view that make the area of interest easiest to review. Choose the relevant treatment mode, inspect the available points and add the selections you want to represent in the plan. You can return to the layers and camera controls while the proposal takes shape.
The planner includes modes for botulinum toxin, hyaluronic acid fillers and biostimulation. These categories organize the interface. The clinician remains responsible for evaluating the patient and deciding whether any proposed treatment is appropriate.
Review the map and its entries together
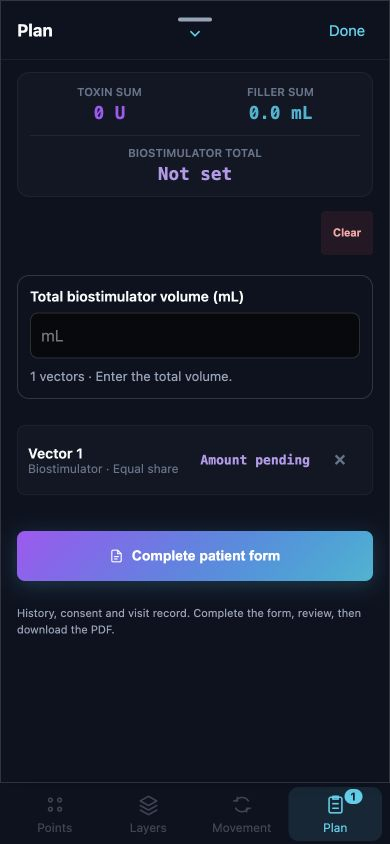
The expanded plan drawer shows the selected entry and a direct route to the patient form.
View full-size screenshotThe planned entries panel gives a list view of the selections shown on the model. This is useful when you need to check a proposal item by item after reviewing its overall distribution. The plan summary gathers the relevant totals from the entries already selected.
A visual map provides context that a list alone does not show, while the list makes each selection easier to review. Before moving to patient documentation, check the model, current plan and selected view together so the exported preview reflects the proposal you intend to discuss.
Prepare documentation with consistent views
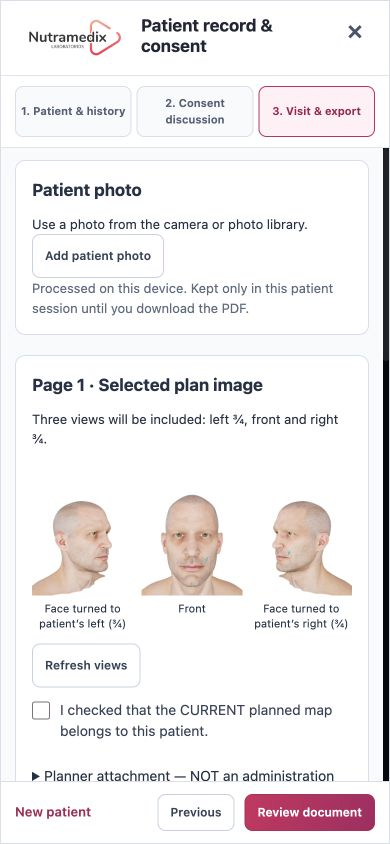
The visit form prepares three model views, with the frontal view centered, for review before export.
View full-size screenshotThe patient form workflow includes history, consent and consultation sections, followed by a review stage before document export. The plan attachment can show three views: a frontal image in the center and a three-quarter image on either side. Consistent image proportions make the views easier to compare.
The form asks the clinician to verify that the current planned map corresponds to the patient. Keeping that review explicit distinguishes the selected proposal from a completed administration record. The anatomical model is a reference image rather than a photograph or scan of that patient.
Continue from planning to consultation preparation
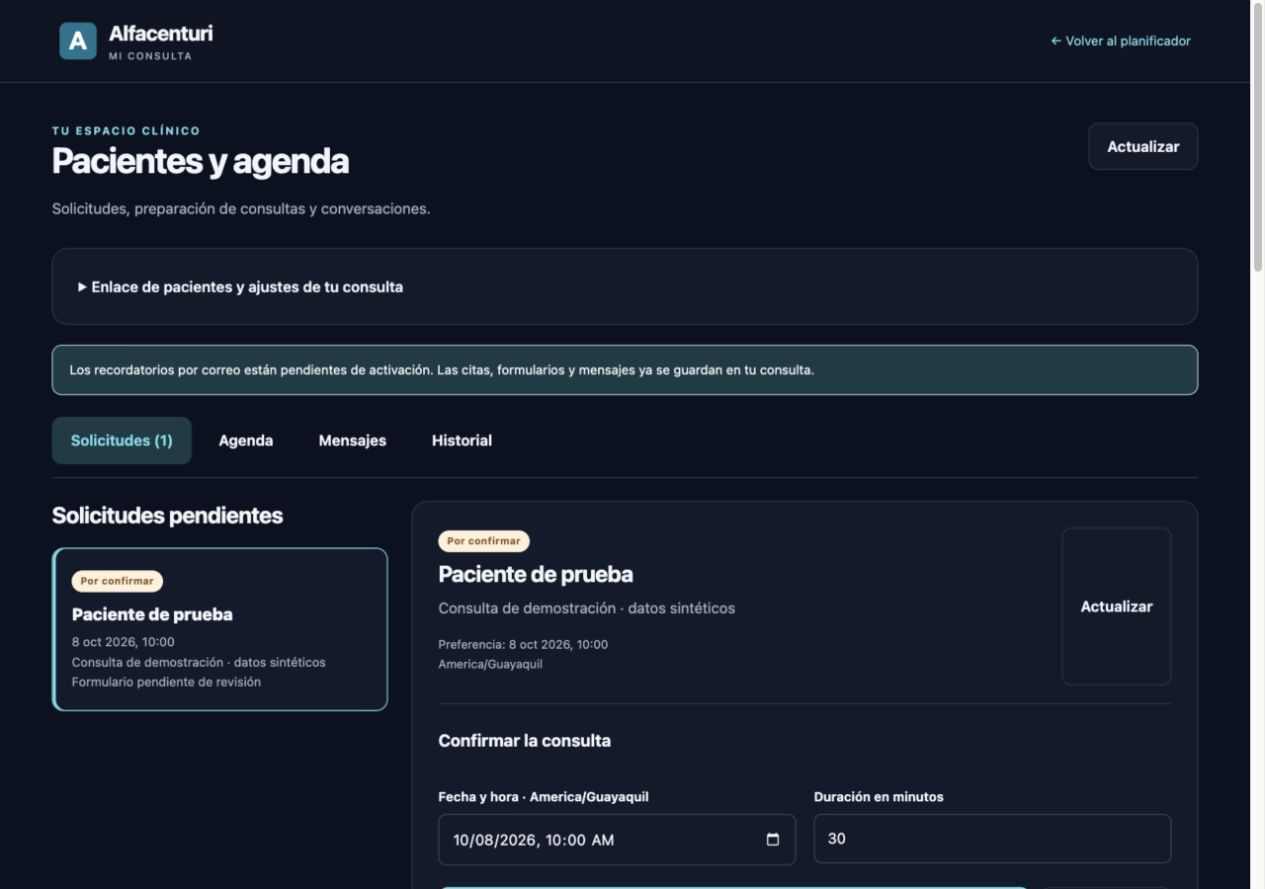
A clinician opens a submitted request to review its information and choose an appointment time.
Demonstration workspace · Synthetic data · Portal shown in SpanishView full-size screenshotThe separate clinician portal handles appointment requests, submitted forms, before photographs and patient conversations. It gives the practice a place to review information sent ahead of the visit. The visual planner and the patient portal serve different steps of the same consultation workflow: reviewing a proposal and preparing the information around the appointment.
Questions about the software
Does a saved plan mean a treatment was performed?
No. A planned map documents a proposal. It is distinct from a record of treatment administration and does not itself confirm that any procedure took place.
Can I show more than one view of the plan?
Yes. The patient form preview can include frontal, left three-quarter and right three-quarter views, with the frontal view in the center.
Does the planner choose the treatment for the patient?
No. The planner organizes selections made in the interface. Patient assessment and treatment decisions remain with the clinician.